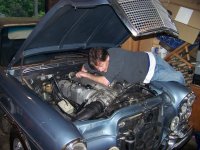
Injection pump replacement. Part 2

More threads by abl567

abl567

Super Moderator
Moderator
Messages
2,197
Points
240
Location
Sydney
I installed the spare pump today after making new gaskets and sealing with Locktite 518, great stuff.

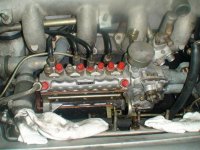
The pump went into place easily enough

DSC00284.jpg

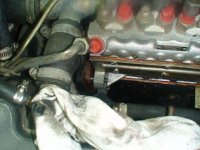
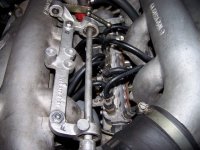
However it was not lined up right

DSC00285.jpg

A few more contortions and twists and it all lined up and slide home

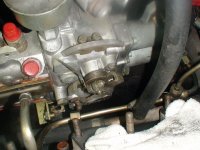
now to set up the regulator linkage
DSC00287.jpg
 

Styria

The Godfather
Moderator
Messages
9,403
Points
622
Location
Sydney
Hi abl567, I just need to ask you some pertinent, and perhaps, impertinent, questions.

Prior to removal of the other pump, at what position did you have the crankshaft at ? At the recommended 60 degrees ATDC ? As you know, that's critical. Also, how do you set up the regulator linkage ? It will, indeed, be very interesting to see how your car will perform, and if it will perform correctly with the replacement pump fitted. Regards Styria
 
OP
abl567

abl567

Super Moderator
Moderator
Messages
2,197
Points
240
Location
Sydney
Hi Styria,
Yes I set the crankshaft to 60 degrees ATDC at cylinder 1, both are critical to correct pump timing.
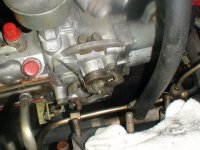
The regulator linkage is set up by adjusting the length of the rods connecting the main throttle arm to the throttle body and injection pump levers. The pump has a position indicator as shown below
DSC00287.jpg

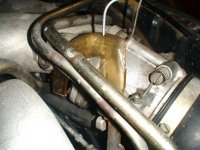
To indicate the position at the throttle body I attach a protractor to the lever and use a pointer made from coat hanger wire!
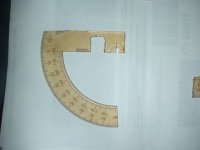
DSC00086.jpg
DSC00085.jpg

The relationship between the throttle body and pump angles is not linear, for example when the throttle body is at 2.5 degrees the pump must be between 4.4 and 5.1 degrees, at 20 degrees on the throttle body we need between 28 and 31 degrees at the pump, the differences then narrow untill 80 degrees on the throttle is 79-82 on the pump. The geometry of the linkage allows this non linear relationship so long as the rods are the correct lengths. The challenge is setting these right while making sure you still acheive full throttle openings with your foot flat to the floor and the kickdown switch activated.
The first time I set mine I found I only had about 80% throttle so adjusted to get full throttle, the difference was pronounced, as were the chirps from the tyres:)

I to am interested to see if the car will in fact run at all with this pump, I purchased it from a M-100 group member as good to go but of course with no warranty. It LOOKS in good condition but that means nothing other than it hasn't been tampered with.
Whatever the outcome with this pump the old one was leaking so badly it had to come out. Even the gasket between the pump and the block had evidence of a decent size leak and while it has been sitting on the garage floor it has leaked most of its oil out.

I'm having the old pump rebuilt anyway so if this new one works well I'll have a good spare. It maybe extra work but if it keeps my car on the road I'm happy to gain the experience, it will be easier next time:rolleyes:
 
OP
abl567

abl567

Super Moderator
Moderator
Messages
2,197
Points
240
Location
Sydney
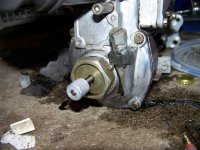
I took a day off work today to try and tune the new injection pump in the 6.3 and hopefully get it running right. Before I installed the pump I set the idle mixture thumb screw to as close to the middle of the range I could, I did this by turning it all the way one way then all the way back the opposite way counting the clicks as I went, of course then halved the number of clicks counted and went back to "centre" the thumbscrew is a sod to get at when the pump is in so I wanted a baseline to start from

The thumbscrew
101_1215.jpg
How to access it with the pump installed, I should add one cannot simply turn it to adjust the mixture, you have to push it in against spring pressure to engage the screw to the rack:( I've seen vets do this sort of thing...
101_1181.jpg

All back together
101_1214.jpg

I removed the coil lead, switched on the ignition to run the fuel pump and prime the injection pump with fuel then cranked the engine on the starter until oil pressure built up to ensure the pump had an oil supply, all good so I replaced the coil lead and it fired up instantly and ran well but was again rich,
I backed the mixture thumb screw to as lean as possible then added 2 clicks at a time until I had 3% CO2 at idle in gear.

After a brief test drive I was impressed with the changes, it feels much stronger and smoother, pulling to redline as crisp as. Time will tell but I feel the early signs are that I have a good pump in there now, no oil in the valley, no smoke from the exhaust I can see from the drivers seat. A fuel and oil consumption test will be in order, now to go for a run and see how it goes:D
 
Last edited:
Similar threads
Thread starter Title Forum Replies Date
abl567 Injection pump replacement. Mercedes W108 and W109 7
Styria 6 cyl. (Pagoda) Injection Pump Articles 0
Styria Servicing 6.3 Injection Pump Mercedes W108 and W109 2
S Direct injection Articles 1
J Bosch D-Jetronic Fuel injection 1974 280 SE W116 Articles 17
Tony66_au D-Jet Injection system. Technical Information 17
Styria Early 6 cylinder fuel injection Articles 0
Styria K-JET Injection system Technical Information 12
hoddo water/methanol injection Talking Torque 4
abl567 WTB Bosch 0442201002 Fuel Pump Mercedes W108 and W109 11
Oversize Fuel Pump Relay $$ Outrage Talking Torque 7
Styria Power Steering Pump Technical Information 1
Styria 6.9 Water Pump replacement Technical Information 35
A water pump Mechanicals 7
Oversize Fuel pump safety cutout Mechanicals 5
Oversize 450 fuel pump relay Technical Information 11
L Water Pump Flow Rate Mechanicals 19
Oversize Petrol pump cutout Mercedes W116 1
MercedesMike 6.9 Transmission Pump Mechanicals 8
SELfor50 6.9 Suspension Pump - New (almost un-used) Gumtree/eBay/Facebook Listings 12
Styria 6.9 water pump housings Mechanicals 1
Styria 6.9 water pump removal Mechanicals 4
J Last rites for a fuel pump Mechanicals 0
M The Chronicles Of Mercules - Water Pump Mechanicals 12
Styria 6.9 Water Pump Removal Mechanicals 4
B Which Bosch fuel pump do I need for my 450SE D-Jet 1975 Mechanicals 1
TJ 450 Washer pump removal on 6.9 Mechanicals 3
J Euro Headlamp Bushing DIY Replacement Technical Information 0
Oversize Replacement Wheels & Cleaning Exteriors and Body Repairs 3
Styria 6.9 Carpet Replacement Interiors 1
Oversize Suggestions for a daily replacement Talking Torque 20
c107 Monovalve replacement Mercedes W126 0
S Air Bag Replacement Mechanicals 9
4 450SEL Hood Pad replacement Exteriors and Body Repairs 23
L Clock Replacement Mechanicals 5
A Soft Top Replacement Mercedes R/C107 3
AM1961 Inertia Reel Seat Belt Replacement Interiors 18
WGB Rear 6.9 upper strut mount replacement Technical Information 0
WGB Rear sway bar chassis bush replacement Technical Information 0
WGB RH Sway bar chassis bush replacement in RHD 6.9 Technical Information 0
WGB Rear Screen removal and replacement Interiors 2
WGB M117 Timing Chain Replacement - Pictorial Technical Information 11
abl567 6.3 Camshaft replacement Mercedes W108 and W109 0
WGB Pictorial - Rear End Rebuild Part 7 - Diagonal arm bush replacement Technical Information 1
WGB Pictorial - Rear end rebuild Part 3 - Pinion seal replacement. Technical Information 0
Styria Replacement of four doors - 6.9 Technical Information 25
Styria Replacement of Air Con hose Mercedes W116 0
Styria 6.9 front suspension valve replacement Mercedes W116 12
J 6.9 Air cells check & replacement Mechanicals 8
BenzLover Engine radiator replacement Mechanicals 3

Similar threads

Top