Aux Air Valve refurb ( AAV )

More threads by Tony66_au

Tony66_au

New Member
Messages
2,306
Points
0
Location
Gippsland, Vic
As you all know I've recently had a shot at refurbishing my AAV for my D jet 450, The AAV is common to the 280/350/450 M116/M117 in both D and K jet and I believe the AAV's themselves are the same.

So I've collected up my ramblings and pics and im placing them here as an easily searchable resource.

Feel free to add your 2 cents worth and correct me if im wrong.

Cheers,
Tony
 
OP
Tony66_au

Tony66_au

New Member
Messages
2,306
Points
0
Location
Gippsland, Vic
The original thread BTW, is here http://www.topklasse.org/forums/showthread.php?t=496

THE TESTING!

One x Pyrex high temp glass jug

One x Meat thermometer

Boiling water, add AAV to taste.

GEDC1737.png


The method is simple, fill glass jug to 75% with boiling water, place thermostat in jug and check temp.

GEDC1738.png

Place AAV in hot water making sure to NOT get the insides wet.

Using the torch check the progress of the slide.

Slide progress

GEDC1739.png

A few traps to observe, I am told the valve should not allow air to pass @ 66 Celsius.

This usually means putting your lips to the AAV and sucking or blowing,

Problem #1 is that the AAV is currently at or around 80 Celsius so I liberated the short air hose and left it on the unit .

Problem #2 is more of a cautionary note as your AAV is likely still contaminated with brake cleaner or degreaser which is toxic at normal temps and very much so at near the boiling point of water so resist the urge to suck test the valve.

Sadly my valve didnt seal shut as the picture has shown so my next task is to pinch the bulb in the bottom of the AAV and retest in hot water which im told works "Sometimes".
 
Last edited:
OP
Tony66_au

Tony66_au

New Member
Messages
2,306
Points
0
Location
Gippsland, Vic
Testing phase over we go to cleaning the AAV

Ok, this after noon I removed my AAV for testing Pn# 0280140017.

2 x 4mm hex screws held it in place and when she popped out of the jacket I lost half a cup of coolant and no more.

I gave her a quick squirt of brake cleaner to get rid of any grunge on the outside and wiped the bulb on the bottom clean so it was ready for testing.

I noted that the bulb has -30 celcius stamped on the bottom, any idea what that's about?

Anyway, with a kettle full of boiled water, a pyrex jug and my thermocouple and multimeter telling me the tamp was @ 90 degree's I immersed the bulb and base of the AAV in the water and watched the slide to see if it closed by blowing down the outlet.

Yes the slide moved to almost closed but air still freely passed through the valve even though it was now too hot to hold in my hands.

So the unit is faulty and slow to move.

Next step meant back to the bench where I had a few cans of brake cleaner and some parts wash along with an empty 5 lt oil bottle with the side completely cut out.
I usually try for a nice bright colour but today all I had was a grey bottle as the colour helps to show how much crap is being washed out of the part you are cleaning and I wasn't disappointed with a fair amount of fine black dust washing out into the oil container.

BTW I alternated between the cheapy degreaser @ $2 a can and the brake cleaner to get good results with a bit of a soak.

Why? Because brake cleaner evaporates quickly and degreaser does not.

Ive also used a trans fluid 1 lt bottle to soak the AAV fully immersed in parts wash fluid and tomorrow after a blast out with brake cleaner and then compressed air I will test the closing and speed again before going to step 2.

Day 3 and more soaking overnight, I removed the AAV from the wash and gave it another blast of brake cleaner washing out a substantial amount of fine black grit before dropping the valve back into the wash, tomorrow I give it a final clean with brake cleaner and leave it to dry before another 80 celcius dunk test, if that fails to close the valve all the way I will try pinching the bulb in the vice or with vice grips to see if that method works and retest again!

Tony
 
OP
Tony66_au

Tony66_au

New Member
Messages
2,306
Points
0
Location
Gippsland, Vic
The semi finished product, back to testing the unit!

Finished soaking the AAV a few hours ago and well and truly blasted out the unit with brake cleaner so there is nothing but cleaner coming out of the unit now.

Uploading a few piccies I took as I type this and I will post them shortly.

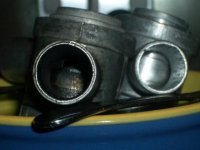
The Aux air valve after cleaning.

40988da5.png

ff161c8e.png

ac3c779b.png

Just up and to the left of the distributor you can see the hole in the coolant jacket where the AAV was removed, Minimal coolant loss was experienced.

And a quick M117 mug shot.

Excuse the grubbiness but it did rupture an oil line under Alex's care and he had his hands full making repairs so when the car is running well I will give the poor old girl a de-grubbifying.

GEDC1706.png
 
Last edited:
OP
Tony66_au

Tony66_au

New Member
Messages
2,306
Points
0
Location
Gippsland, Vic
A reliable source (MBGraham) tells me a new AAV should be fully closed @ 66 Celsius and Ive edited my posts to reflect the correct temp.

I've pinched the bulb twice now with vice grips adjusting them up half a turn and closing them, opening them and repeating @ half a turn.

The result is that at 80 degree's the AAV is almost shut with a fair restriction when I blow through the valve.

So its back to pinching the bulb but this time im shooting for a lower closing temp of 66 - 70 Celsius......

Tony
 
OP
Tony66_au

Tony66_au

New Member
Messages
2,306
Points
0
Location
Gippsland, Vic
This evening late I reinstalled the AAV using sensor safe copper maxx hi temp silicone and a new graphite gasket I cut from a sheet of gasket paper.

Topped the coolant off with 500 ml or so and turned the key.

I noticed the temp graduation on the guage is in 20 Celsius increments and just in the 60 degree mark the high idle started to come down until at a needles width past the 60 mark she settled for a nice resting RPM rate.

Test run minus air cleaner assy fitted and without the sensor in the air cleaner assy attached, Idle tested with AC on in neutral, park, drive and reverse and its all solid although probably a smidge low loaded up.

Checked the idle screw and it has been screwed fully clockwise already so I cant lower the idle there anymore and turning it anti clockwise raises the idle speed so I suspect the system is out of whack somewhere probably during an attempt to drop the idle before I got the car.

All in all a good result!
 

Oversize

Grand Master
Messages
5,863
Points
596
Location
Melbourne
Check for vacuum leaks, stretched timing chain and ignition timing issues. Personally I hate it when I can't slow down the idle via the screw.... :mad:
 
OP
Tony66_au

Tony66_au

New Member
Messages
2,306
Points
0
Location
Gippsland, Vic
Check for vacuum leaks, stretched timing chain and ignition timing issues. Personally I hate it when I can't slow down the idle via the screw.... :mad:

Vacuum system is tight and was the first job I tackled figuring I wouldn't get honest base readings if the system was sucking where it wasn't supposed to.

I checked the timing when I checked the Vac advance/retard and it was close to spec.

I don't want to check the timing chain although im not getting any unusual noises so its on the back burner. :D
 

Oversize

Grand Master
Messages
5,863
Points
596
Location
Melbourne
We used to belt these things on the top with a hammer in an attempt to fix this problem!! :eek:
 
OP
Tony66_au

Tony66_au

New Member
Messages
2,306
Points
0
Location
Gippsland, Vic
They seem to collect a bit of carbon or more likely disintegrated rubber hose over the years Mark because what came out of the unit was fine black dust.

This is why I use a clean container and always rinse my brushes clean etc and the first 3 blasts with parts cleaner showed a fair whack of these black particles.
 
OP
Tony66_au

Tony66_au

New Member
Messages
2,306
Points
0
Location
Gippsland, Vic
I should pull a dud AAV apart some time I guess but my understanding of how it works is that the brass bulb that sits in the coolant has oil in it that expands with increase in temp and this pushes the piston up in the bore of the valve reducing the air flow.

I suspect the spring just keeps the piston square in the bore so it is less likely to jam and to aides in the return of the piston to fully open as the coolant drops in temp and that this expanding oil or fluid weeps past over time making the reaction to heat slower and less effective.

So the simple action of crushing the bulbs a bit restores the static pressure to what it should be to operate effectively.

This is further backed up by the pictures I've seen of factory refurbished AAV's having 4 neat uniform indents on the bulbs.

The refurb is fairly simple and cost me 5 cans of Repco degreaser and a full can of brake cleaner so under $30 and maybe 3 hours over 4 or 5 days once the AAV is removed with an hour of static testing with a jug and hot water.

I have to say I was stoked when the AAV worked properly too :)
 

WGB

New Member
Messages
1,289
Points
0
Location
Perth Western Australia
This is a very topical discussion and thanks for the writeup.

I understand AAV's are now in the rocking horse poo category so looking after what we have is going to be necessary.

The first thing is that D-jet and K-jet motors have different AAV's - the major difference seems to be the extension on the top of the housing.

The K-jet one is flatter and the air tubes go straight through like motorcycle carb.

Here is a picture I took some years ago of an old and a new (when they were $175 from M-B Spares) K-jet type AAV sitting side by side in a mug of hot water showing the difference in openings at the same temperature.

OldandNewAuxillaryairvalves.jpg

It is the K-jet type that is apparently hit with a hammer to seat the top and help with the opening.

They are also filled with wax so I suppose so long as they don't leak the mechanical parts can be cleaned /refurbished.

Bill
 
OP
Tony66_au

Tony66_au

New Member
Messages
2,306
Points
0
Location
Gippsland, Vic
Thanks Bill, I've seen your written articles and thus praise from your fine self is more than enough to make my head swell a little.

Over the next week im starting work on the K jet 450 in an attempt to get her starting and running on petrol so the first task will be the AAV and as such I will take lots of piccies and create a few more posts with K jet particulars editing the D Jet to reflect the differences.

I also have a pile of bookmarks within the Bosch tech website in an attempt to shed more tech info on these crude devices as well as chasing up a dodgy workaround or 3 using later model Bosch AAV's with electrical control instead of the wax pellet or oil expansion bulbs and I will be translating the German contents and posting the relevant details here for those who want them.

I have also found that Air Valves are used in many many brands of automobile and not all have Bosch systems so there may be some helpful info there but my primary focus is Mercedes Benz AAV's and specs.
 
Similar threads
Thread starter Title Forum Replies Date
S aux air valve Mercedes R/C107 3
S Aux air valve Mercedes R/C107 3
S aux air valve Mercedes R/C107 6
J Aux Air Valve Mechanicals 2
Michel Medium size air compressor for sale. Gumtree/eBay/Facebook Listings 1
S Air Bags Articles 5
S Air Con mystery Articles 24
Oversize Cold air intakes & intercoolers Technical Information 0
S Air Bag Replacement Mechanicals 9
A Air conditioning parts Mechanicals 6
S Seat Air Bladders Websites and Links 4
c107 electric air con Interiors 3
A Air con drain Mechanicals 3
S Air Bags work ! Exteriors and Body Repairs 11
S Air compressor Gumtree/eBay/Facebook Listings 0
Oversize Restrictive Air Filter Assemblies Mechanicals 49
260ebenz Air con re-gas Talking Torque 34
motec 6.9 Red Dot Lemforder air cells Gumtree/eBay/Facebook Listings 2
motec 6.9 wanted 560 twin air cleaner Mechanicals 23
S fresh air out let Mercedes R/C107 3
S Air con. problem 280SL 107 '81 Mercedes R/C107 5
A air flow meter Mechanicals 2
S air con pressure switch Mercedes R/C107 0
S air con pressure switch Mercedes R/C107 7
T W107 Heater/Air conditioning Mercedes R/C107 19
Oversize 6.9 throttle & air filter conversion Mercedes W116 4
260ebenz Cleaning air vents Interiors 4
M 116 Genuine AMG front air dam questions Exteriors and Body Repairs 3
Styria Replacement of Air Con hose Mercedes W116 0
J 6.9 Air cells check & replacement Mechanicals 8
A 450SEL Air cond Mercedes W116 10
Styria Removal of 6.9 Master Air Cell Mechanicals 1
A 450SEL Air cond Mercedes W116 7
B Air Conditioner Puzzle Mercedes W116 5
Michel Air Bags for 300SEL -Starting @ $50 Gumtree/eBay/Facebook Listings 0
J 6.3 Front Air-Bags Gumtree/eBay/Facebook Listings 3
WGB Cold air intake(s) Mechanicals 25
6.9forever Air conditioning that works too well! Interiors 11
OzBenzHead WTB (or otherwise legally obtain): W112 / W109 air suspension valves Gumtree/eBay/Facebook Listings 3
Styria Air Pressure Cells Mechanicals 35
Des Air cleaners Exteriors and Body Repairs 14
hoddo how colds your air? Mercedes R/C107 4
M Mercedes 6.9 suspension valve Technical Information 2
S Transmission - Valve Body Mechanicals 10
S Mercedes 6.9 Transmission Modulator Valve Mechanicals 6
Patrick_R Variable valve duration technology Technical Information 3
S Turbo Boost Valve Technical Information 10
Oversize Valve Sizes Technical Information 4
D Noise from valve train - 6.9 Mechanicals 0
Oversize Custom throttle and SLS valve linkages Mechanicals 1

Similar threads

Top