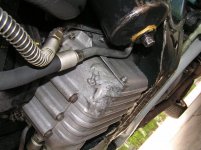
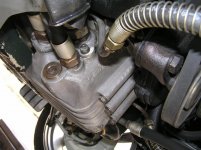
If one keeps it simple, the job is straight forward - well, at least, you would think so. Two ways of doing it - depending on facilities at your disposal, and the amount of care you want to put into it. I'll go the simple way first, assuming you don't have a lifting hoist - in other words, you're doing the job "on the ground" so to speak, with the help of a good quality trolley jack.
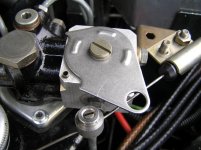
1) Set the sliding disk on top of the distribution valve to the high setting, start the engine to attain the high level. Turn off engine.
2) Slide trolley jack under engine and jacking point member, and lift high enough to "just touch" that member. DO NOT LIFT THE CAR AT THIS STAGE.
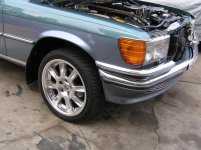
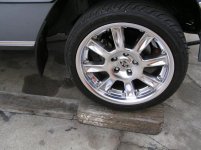
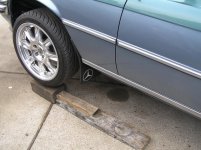
3) Move the sliding disk back to the "lock" position, and now further lift the car until you are able to slide 6" by 6" timber blocks under each front wheel, lower the car (obviously with wheels attached) down unto the timber blocks - at this stage, you should be able to observe if the "locked" position will hold the car in the locked position. If not, there may be some problems a little down the track when you come to lower the car back to the "road position" after completion of the oil change. Withdraw the trolley jack from under the car.
You now have unimpeded access to the drain plug, plus the car is high enough to comfortable slide under a large container to catch all that oil that will come gushing out once you remove the drain plug. A word of warning: If you are draining hot engine oil (and it should be HOT to get a clean and proper drain), be careful not to get scalds on your hands. Also a word of advice - it pays to remove the capped dipstick from the reservoir top to eliminate possible air locks.
So now, you will need a 14mm Allen headed socket to remove the drain plug - but as I said, be careful. I normally leave the oil to drain for about two hours. During that time, I take the opportunity to remove the oil filter housing and oil filter. Again, have a reasonably sized container to place under the housing. Also, as you are loosening the long retaining fixture bolt, there will be quite a bit of oil "splashing", so have a rag handy to clean your hands. Also, the housing and filter are quite heavy and you are likely to drop the whole assembly, preferably into your container.
Also, in the two hour period, I wash the filter housing in kerosene, and degreaser, and wash out with water, but make sure to blow it dry with compressed air. Once you have fitted the new filter to the canister, refit by means of a 17mm socket and short extension. Now, you should be ready to tackle the task of refilling with fresh oil. Invariably, I start off with about six liters of "very good quality" oil, start the engine and observe the oil pressure gauge to rise to the "maximum" position. Switch off engine, and add the extra six liters (the system hold a total of twelve litres), restart engine, and keep running, and then proceed to stick your head under the front of the car to make sure that there is no oil leakage.
Last step is to place two blocks of timber (3 by 4) BEHIND the 6 by 6 timber blocks and drive the car off BACKWARDS, lift bonnet and return the control disc back to the "NORMAL" position - resting against the rolling pin. You should now be in business, as long as the car's suspension will co-operate with you. Most of the time it will, sometimes it won't and that's when your fun can start. Regards Styria
N.B. Next post will deal with some procedures that I like to follow. If anyone has any queries, just communicate within the guidelines of this thread.
Last edited:

