Valve Grind & De-coke on 6.9

More threads by Styria

Styria

The Godfather
Moderator
Messages
9,403
Points
622
Location
Sydney
Well, it's been coming for quite a long time - too much Oil and Water mixed together make for a nice coloured Caramel combination, but it's not the best application for a well lubricated engine.

I knew it was time when, within 21 kilometers and overnight, 12 litres of fresh oil decided to go 'creamy'. It also got to the stage where too much of the clear stuff in No. 4 cylinder prevented the Starter Motor from turning over the engine. I have always believed in 'Gleaming Beauty' telling me when it was time for rectification work and clearly that time had arrived. :( No good kidding yourself -this was for real.

gearboxmodelnumbers368.jpg

There were several factors that were instrumental in mine not carrying out this work earlier. Firstly, you have to decide whether or not to remove the engine from the car, as it would be far easier to get to all components. However, I was not in favour of that idea on account of:

a) Difficulty in removing A/C compressor, and
b) The three oil lines connecting the oil tank to the small sump.

Time was also a real problem, plus I lacked the confidence required in tackling work of this magnitude. In addition, I had no spare head gaskets to have some made up locally on account of the cost of the item from Mercedes. This last named was kindly solved for me by Anthony (abl567) who procured the gaskets for me from Tom Hansen in the states. Thanks Anthony - you're a champ. So on with job. Regards Styria
 
OP
Styria

Styria

The Godfather
Moderator
Messages
9,403
Points
622
Location
Sydney
Okay. I am not going to bore you with a 'blow by blow' description or details of 'removal procedures'. Most of it is self explanatory - in other words, you need to remove a fair number of components before you get to the 'nitty gritty' - i.e. removing the heads.

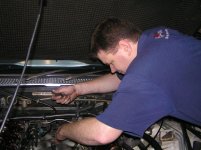
It was at this stage that "Lady Luck" arrived in the shape of Mercules, who offered to help with the job. I won't go into the finer details, but his offer was God's help sent. Thus, by 6.30 am I had drained the cooling system, parked the car in the shed with suspension in the 'locked' position, and drained the oil from the small sump and the oil reservoir - with the last named, I had to poke a screw driver through some gunky, but hard caked substance before any oil drained out. Let me tell you, it was such a good feeling to drain out all this 'diabolical mixture'.

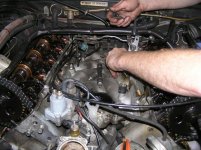
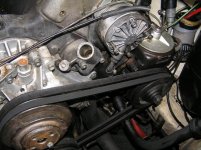
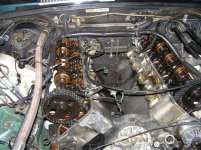
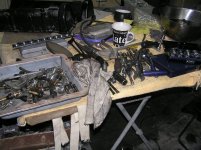
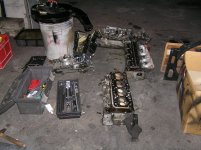
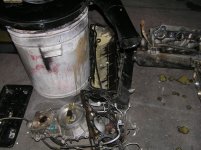
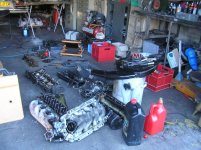
"Lady Luck" arrived at about 9.30 am, and by that time I had removed the radiator and hoses, most of the inlet manifold, rocker covers etc. etc. - unfortunately, one of the bolts retaining the manifold broke in the head, but that was half expected. Okay, time for some pics.

gearboxmodelnumbers369.jpg


gearboxmodelnumbers367.jpg


gearboxmodelnumbers366.jpg


gearboxmodelnumbers372.jpg


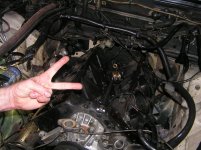
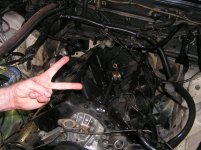
The last gesture by Lady Luck is the victory sign - at long last, heads off - if I remember the correct sequence of photos and work carried out.

gearboxmodelnumbers371.jpg

...and this is the top of the "Engine Room"..

gearboxmodelnumbers370.jpg

All in all, the first head was off by about 1.30 pm, and the second unit (after much grunting, cursing etc.), was off by about 6.30..7.00..can't quite remember. Regards Styria
 
Last edited:
OP
Styria

Styria

The Godfather
Moderator
Messages
9,403
Points
622
Location
Sydney
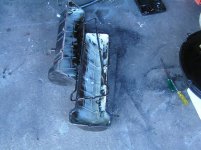
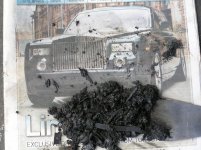
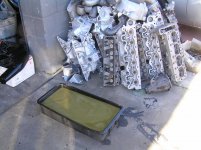
Right, the stuff you see in the picture below is what was 'shovelled up' from the 'V' location in the motor. The Roller as featured in this newspaper clipping is purely co-incidental. Honest !


gearboxmodelnumbers380.jpg


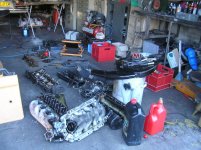
Now, I should stress that after Cameron's arrival, he really took over, and I was relegated to cleaning duties of components removed. As I said, we finished about 7 pm, and I spent virtually all my time cleaning. In fact, I came back the following morning for further cleaning and sorting - for another four hours.
gearboxmodelnumbers377.jpg


gearboxmodelnumbers374.jpg


gearboxmodelnumbers375.jpg


gearboxmodelnumbers376.jpg


gearboxmodelnumbers377.jpg


http://i233.photobucket.com/albums/ee123/styria_01/gearboxmodelnumbers378.jpg[/IMG

RECONDITIONED HEADS (on hand) IN READINESS.

[ATTACH=full]11555[/ATTACH]

That's all for now, folks. More to come, plus observations, in due course. Regards Styria
 
Last edited:
OP
Styria

Styria

The Godfather
Moderator
Messages
9,403
Points
622
Location
Sydney
Hi guys, for anyone contemplating the removal of heads on a RIGHT HAND drive car, I would suggest the following:

1) Removal of the Brake Booster should be almost mandatory. This is in order to gain easier access to the head retaining bolts on the lower part of the right hand head.

2) I have the advantage of having split my engine down pipes by the fitment of flanges - when the time comes for re-assembly, this is going to be quite important.

3) Remove heads with exhaust manifolds attached - I tend to think it would be just about impossible to remove the manifolds with heads still attached to the engine block - even if it could be done, your back and arms would certainly know about it.

4) It is also advisable, more than likely necessary, to place the lower studs into position PRIOR to re-attaching the exhaust manifolds to the heads.

5) When the time comes for re-assembly, I will be using my engine lifting hoist to lower the heads into place - any other way, and it will just about break your back, or you're likely to damage any number of components, especially the head gaskets.


With heads removed, much easier access can be gained to a number of components, such as Steering Box and coupling, Engine mounts and the small stabilizers, and it also gives you the opportunity to have a proper clean-up of the Engine Bay in general. So far, about thirty hours have been spent on this job. In addition, I have used about ten litres of Kerosene in degreasing the engine bay, pressure cleaning the timing chain area (internal) and the small sump by removing the sump plug, filling up the sump cavity and remote oil tank with kerose and petrol and blowing it all out with compressed air. "Gleaming Beauty's" internals should be just about as spotless as one can achieve under the circumstances. More pics. and info to follow in due course. Regards Styria
 

Michel

The Prince of Arabia
Moderator
Messages
10,071
Points
775
Location
Sydney, Australia
I understand now why you have been so quiet lately (in my neck of the woods)...

Glad to see you had some serious help ...

Looks forward to seeing you 'mobile' in the GB again...;)
 

WGB

New Member
Messages
1,289
Points
0
Location
Perth Western Australia
THankyou for the pictures Styria - what a brilliant collection of photos.

Was it a head gasket leak or is it a crack in one of the heads?

Bill
 

s class

New Member
Messages
788
Points
0
Location
South Africa
I'm reading this from work where I can't see the pictures (blocked by the firewall). But I can picture in my mind from the descriptions.

All I can say is well done for taking on such a big task. Guess there was no choice though.... I 'm glad to hear its progressing well though. I would be curious to know the root cause of the problem. Over on the M100 group there has been off and on some talk of the tendency for 6.9 head bolts to slowly work loose as a result of heat-soak from the exhaust manifolds. I gather this would afflict cars used as daily drivers more than those used only for occasional long trips.

I'm looking forward to seein this thread from home this evening, where I will be able to see the photos.
 

Mercules

Spiltting lanes
Messages
191
Points
0
Location
Sydney, Australia

Whilst this may appear to be a jovial "Victory" symbol (Winston Churchill style) it is acutally "up yours" becasue the right side cylinder head fought us all the way - the head was loose and ready to come off but the exhaust manifold would not come past the steering box - it had to be unbolted in situe and let me tell you, the manifold nuts are extremely hard to remove!!! You ain't heard swearing till you heard me trying to get this head off... would have made a truckie's mother blush!

No doubt, this is one of the most complicated mechanical repairs I have ever undertaken - whilst every engine was fitted fully assembled during manufacturing, the 6.9 is so large and tight in design it almost defies logic to dissasemble the motor while its still in the car!!!

I have learnt a great deal from pulling this car apart and I'm looking forward to torquing up the head bolts and hearing it start again... but would just like to warn anyone contimplating this job themselves - this is a job that requires special tools, experience and patience - lucky Styria and I have the tools...;)
 

SELfor50

New Member
Messages
1,197
Points
0
Location
Capitown
Great pictorial Styria!! And all I can say is you're a lucky man to have the Merculian Mercules helping you with this job! Is there gonna be any 'upgrades' at the time of this reco? :D ..you know, while you're there.....

It also scares me seeing the result of these sort of occurences, makes me wonder how far away this 'maintenance' is for a 30yr old m117.
I gotta ask too, was it the heads or just the gasket??
 

SELfor50

New Member
Messages
1,197
Points
0
Location
Capitown
Whilst this may appear to be a jovial "Victory" symbol (Winston Churchill style) it is acutally "up yours" becasue the right side cylinder head fought us all the way - the head was loose and ready to come off but the exhaust manifold would not come past the steering box - it had to be unbolted in situe and let me tell you, the manifold nuts are extremely hard to remove!!! You ain't heard swearing till you heard me trying to get this head off... would have made a truckie's mother blush!

No doubt, this is one of the most complicated mechanical repairs I have ever undertaken - whilst every engine was fitted fully assembled during manufacturing, the 6.9 is so large and tight in design it almost defies logic to dissasemble the motor while its still in the car!!!

I have learnt a great deal from pulling this car apart and I'm looking forward to torquing up the head bolts and hearing it start again... but would just like to warn anyone contimplating this job themselves - this is a job that requires special tools, experience and patience - lucky Styria and I have the tools...;)


Torana68 (Roger) from the 'other site' undertook this job on his M117 450... obviously no comparison in tight fit compared to the 417 M100 block!! However, he did say that the rear bolts, especially on the drivers side require a special "stair" shaped? :confused: cap screw tool. Like a bent allen key?
Is that what was used??

Also what other special tools were required?
 

Mercules

Spiltting lanes
Messages
191
Points
0
Location
Sydney, Australia
Really Mike... Lady Luck? (must have been my Hard Yakka skirt :eek:)

My version of the day's timeline...

  • 11:30 - Mike had the rocker covers off, top dissassembled, oil drained and radiator out - I arrived late after a little sleep in and some home duties
  • 13:30 - Injection off, starting on the manifold then we stopped for lunch
  • 16:00 - Manifold off
  • 16:45 - Left side cylinder head removed - mandatory coffee break
  • 19:00 - The fight ended and the right side cylinder head was defeated

Twas 45 minutes to remove the left head but over 2 hours to remove the right head :eek: Aaarrgh it was a killer!

Special tools Cam?
10mm allen key sockets in about 5 different lengths and one custom made version ;) Crows feet ;) 10 different lengths of 1/4 drive extensions + short & deep sockets ;) a mallet ;) metre-long breaker bar ;) 9" population tool ;) Some extreme tolerance for pain ;) strong forearms ;) an extensive vocabulary in the disciplines of insults, disgust and cursing :rolleyes:
 

s class

New Member
Messages
788
Points
0
Location
South Africa

SELfor50

New Member
Messages
1,197
Points
0
Location
Capitown
HAhaha... great list of tools Cam. I'm guessing it was the extensive vocab that did the trick! :)
 

Mercules

Spiltting lanes
Messages
191
Points
0
Location
Sydney, Australia
It is a time honoured tradition for a mechanic to send the dopey apprentice/work experience kid off the the parts shop for a left-handed screwdriver, a box of blue grinding sparks and a 9" population tool - hahahaaaa :):):):)

So what is a population tool? I think it bears some resemblance to the trouser snake or the lamb cannon :rolleyes:
 
Last edited:

s class

New Member
Messages
788
Points
0
Location
South Africa
Ah, that's why I didn't get it before - here in South Africa they are 10" ;)
 

116Benz

New Member
Messages
489
Points
0
Location
Forest Lake, Brisbane QLD
It is a time honoured tradition for a mechanic to send the dopey apprentice/work experience kid off the the parts shop for a left-handed screwdriver, a box of blue grinding sparks and a 9" population tool - hahahaaaa :):):):)

So what is a population tool? I think it bears some resemblance to the trouser snake or the lamb cannon :rolleyes:

Dont forget the metric shifter and striped paint.
 

s class

New Member
Messages
788
Points
0
Location
South Africa
Ah, now I see the photos. Well done guys. it looks like the heads must have been really close up against the firewall.
 
OP
Styria

Styria

The Godfather
Moderator
Messages
9,403
Points
622
Location
Sydney
I understand now why you have been so quiet lately (in my neck of the woods)...

Glad to see you had some serious help ...

Looks forward to seeing you 'mobile' in the GB again...;)

...only ever a phone call away.....Regards Styria
 
OP
Styria

Styria

The Godfather
Moderator
Messages
9,403
Points
622
Location
Sydney
Just some further observations and other tasks carried out.

Luckily enough, or at least from what I can ascertain so far, no internal engine damage has been occasioned by the mixture of oil and water. I fully expected the complete engine to be covered in that creamy, gooey mess, but such was not the case. Whilst I have not yet examined nor dismantled the heads removed, it was certainly the gasket steel re-inforcing ring on No. 4 cylinder that caused the water leakage problem.

Camshafts and camshaft bearings are still in good condition after some 370k. kilometers, and there is no discernable lip in the cylinder bores.

However, as can be seen from one of my photographs, I already have two reconditioned heads on hand, with new exhaust valve guides and obviously new valve stem seals. They have been skimmed and leak tested, and it only remains for me to check the deck height to ensure that not too much material has been removed from the heads. The "Reconditioner" of the heads when I quizzed him on minimum deck height had no idea what I was talking about - and that was a bit of a worry !

These heads had only done 220k. kilometers, and I will also be using the camshafts and bearings from the same engine. Incidentally, there is absolutely no difference in the high and low compression engines headwise except for a threaded machined boss on the right hand unit to accept the emission pipe for the anti smog pump. Both heads for both types of engines have a channel machined into the head surface which is a potential weak spot as far as head gasket leaks are concerned - cylinders 1 and 2 can suffer from low compression readings, as can 5 and 6. I will, in due course, put up photos to illustrate what I am talking about. Presently, I am considering filling those channels - from memory, both heads have that channel but will double check.

I have also removed the water pump housing in order to gain access to the pins that locate the lower chain guides and rails, particularly the one on the right hand side which is activated by the chain tensioner. They're expensive (at least $A700.00 - ridiculous) but I have a good second hand unit from the other engine. Talking prices, I have ascertained that the sixteen locknuts for the exhaust manifold retail for $4.00 each - I know what I won't be buying.

So, that's just a bit of an update. Will provide further information as the "beautifying process" continues. Regards Styria
 
Similar threads
Thread starter Title Forum Replies Date
M Mercedes 6.9 suspension valve Technical Information 2
S Transmission - Valve Body Mechanicals 10
S Mercedes 6.9 Transmission Modulator Valve Mechanicals 6
Patrick_R Variable valve duration technology Technical Information 3
S Turbo Boost Valve Technical Information 10
Oversize Valve Sizes Technical Information 4
D Noise from valve train - 6.9 Mechanicals 0
Oversize Custom throttle and SLS valve linkages Mechanicals 1
Styria Valve Body - Ch.116 6.9 Technical Information 4
S valve stem seals 110 DOHC 6 Mercedes R/C107 4
S aux air valve Mercedes R/C107 3
S Aux air valve Mercedes R/C107 3
L Front Suspension Valve Parts Mechanicals 28
motec 6.9 SLS Valve on ebay UK Gumtree/eBay/Facebook Listings 1
Oversize 6.9 control valve for sale Gumtree/eBay/Facebook Listings 3
S aux air valve Mercedes R/C107 6
WGB LH Sway Bar chassis mount and levelling valve in RHD 6.9 Technical Information 2
Tony66_au Aux Air Valve refurb ( AAV ) Technical Information 12
T valve stem guide seals Mercedes R/C107 5
Styria Valve Body Removal Technical Information 2
Styria 6.9 front suspension valve replacement Mercedes W116 12
A Auto tranny modulator valve Mercedes W116 7
Styria Removal - 6.9 rear suspension valve Mechanicals 0
G Any trick to replacing heater valve? Mercedes W116 5
WGB Valve spring compressors M100 and M116/7 motors. Mechanicals 7
abl567 Blocked TX Valve Mechanicals 9
WGB Initial setting of hydraulic valve train Mechanicals 0
G Valve stem seals on M110 2.8 Mechanicals 2
s class How NOT to correct your 6.9 valve timing Mechanicals 4
s class 6.9 valve timing sorted out Mechanicals 36
J Aux Air Valve Mechanicals 2

Similar threads

Top