WGB
New Member
This is a previous posting reprinted with photos now posted to imgur.com - test run to see if that which was lost can be found.
Since I purchased my 6.9 (2 1/2 years ago now) I have contended with a squeak at one or other fan speed which this summer has become almost continual and has often made me leave the car at home.
This week a new US fan motor arrived from autoausaz.com and on a beautiful Perth day I started fiddling with it.
It has a few differences
1) The electrical cord is shorter and terminates in a 2 pin Bosch connector.
2) The electrical cable exits the motor at a different point
3) The fan spins in the opposite direction
4) Both motors have a system of ventilation where air enters the motor via an entry hole hidden beneath the hub of the birdcage fan but the exit spigot is about 30 degrees different between the two motors.
This exit spigot is connected to a moulded rubber tube which presumably exits the cooling air back into a lower pressure part of the ducting.
This ventilation is presumably good and bad for although it cools the motor it also fills it up with decades of crap and either the bearing or more likely the brushes and commutator start squeaking.
I had an old section of ducting and spare old motor so I was able to test it with both an old fan motor and also the new fan motor before tearing the car apart .
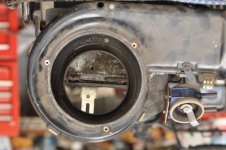
Here is the ducting showing on right of picture the lever that is controlled by a bowden cable from the fan switch to open or close airflow into the HVAC system and beneath it the vacuum diaphragm worked by the temperature knob that controls the flap that mixes fresh or recirculated air.
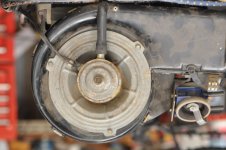
Here is an original motor mounted showing the position of the ventilation hose and the exit point for the wiring harness.
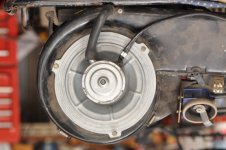
Here is the new US motor fitted showing the differences. I had toyed with drilling new holes in the housing and moving the trapped nuts but had second thoughts as the rubber moulding is able to be stretched into position and I secured it with cable ties so it wouldn't slip in the future.
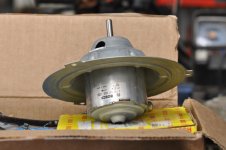
Here is the new motor showing the large ventilation hole which is usually not visible beneath the birdcage fan.
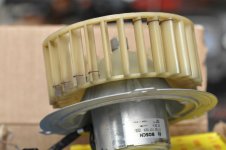
Here is the old fan complete with it's original balance weights attached to the new motor.
It was not difficult to change the fan. I removed the old spring loaded central pressure clip and jammed two large screwdrivers between old motor and the fan. Putting the motor in a vise I tapped the central shaft with a small hammer and a bolt quite gently and then with keeping the pressure on with the two screwdrivers the plastic fan crept up the motor shaft.
The fan is reasonably easy to get at but does require glove box liner, knee rolls and lower ducting removed. I removed the glovebox door as well but this is not really necessary.
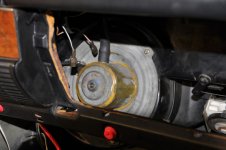
Here is the old fan in position and as the wiring is a bit of a stretch it is worth cutting the old cable as close to the motor as is practical both to aid getting the motor out as well as to give enough length with the new wiring.
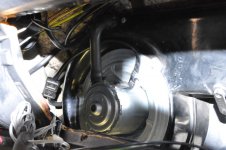
Here is the new motor in position with cable ties on the ventilation tube to make sure it doesn't slip and an original two pin Bosch connector taken from my parts car connecting the old with the new wiring.
The polarity at this connector has been reversed so that the red power supply is connected to the brown earth lead of the new motor and vice versa.
It has a good output and the sounds of silence are deafening.
Bill
Since I purchased my 6.9 (2 1/2 years ago now) I have contended with a squeak at one or other fan speed which this summer has become almost continual and has often made me leave the car at home.
This week a new US fan motor arrived from autoausaz.com and on a beautiful Perth day I started fiddling with it.
It has a few differences
1) The electrical cord is shorter and terminates in a 2 pin Bosch connector.
2) The electrical cable exits the motor at a different point
3) The fan spins in the opposite direction
4) Both motors have a system of ventilation where air enters the motor via an entry hole hidden beneath the hub of the birdcage fan but the exit spigot is about 30 degrees different between the two motors.
This exit spigot is connected to a moulded rubber tube which presumably exits the cooling air back into a lower pressure part of the ducting.
This ventilation is presumably good and bad for although it cools the motor it also fills it up with decades of crap and either the bearing or more likely the brushes and commutator start squeaking.
I had an old section of ducting and spare old motor so I was able to test it with both an old fan motor and also the new fan motor before tearing the car apart .

Here is the ducting showing on right of picture the lever that is controlled by a bowden cable from the fan switch to open or close airflow into the HVAC system and beneath it the vacuum diaphragm worked by the temperature knob that controls the flap that mixes fresh or recirculated air.

Here is an original motor mounted showing the position of the ventilation hose and the exit point for the wiring harness.

Here is the new US motor fitted showing the differences. I had toyed with drilling new holes in the housing and moving the trapped nuts but had second thoughts as the rubber moulding is able to be stretched into position and I secured it with cable ties so it wouldn't slip in the future.

Here is the new motor showing the large ventilation hole which is usually not visible beneath the birdcage fan.

Here is the old fan complete with it's original balance weights attached to the new motor.
It was not difficult to change the fan. I removed the old spring loaded central pressure clip and jammed two large screwdrivers between old motor and the fan. Putting the motor in a vise I tapped the central shaft with a small hammer and a bolt quite gently and then with keeping the pressure on with the two screwdrivers the plastic fan crept up the motor shaft.
The fan is reasonably easy to get at but does require glove box liner, knee rolls and lower ducting removed. I removed the glovebox door as well but this is not really necessary.

Here is the old fan in position and as the wiring is a bit of a stretch it is worth cutting the old cable as close to the motor as is practical both to aid getting the motor out as well as to give enough length with the new wiring.

Here is the new motor in position with cable ties on the ventilation tube to make sure it doesn't slip and an original two pin Bosch connector taken from my parts car connecting the old with the new wiring.
The polarity at this connector has been reversed so that the red power supply is connected to the brown earth lead of the new motor and vice versa.
It has a good output and the sounds of silence are deafening.
Bill
