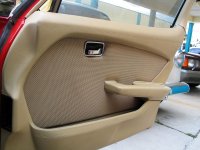
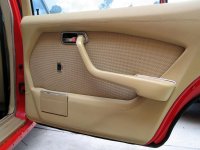
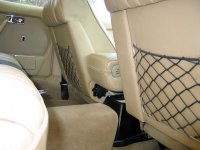
Our cars after forty to forty five years, no matter how good a condition the interior may present, can be badly in need of a make-over. Seats, carpets etc. come to mind readily, but also consider refurbishing of timber embellishments and many other items. This segment applies to cars that have been quite well looked after, regularly garaged and so on - those that have been neglected ? They can be another story again - one that never ends.
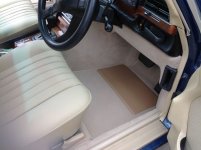
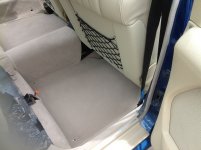
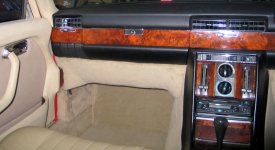
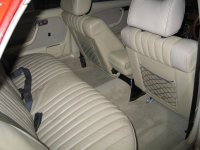
Regarding re-carpeting - many owners tend to think that there are the two main carpets, and perhaps the rear of the centre tunnel, and that's about it. Not so. There are many pieces of carpet, as well as backless carpet, that constitute a carpet replacement task. Take a look -
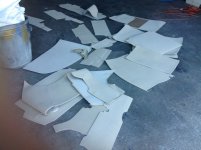
So you can see what I am talking about - apart from the two main carpets, include a) the front centre console halves b) the sill panels on both sides - to replace those, one needs to remove both front seats. Whilst you are in the process of carrying out that task, you may as well remove the bottom cushion of the rear seat - there are two pieces that are glued to the rear seat support panel, and they meet just at the back of the rear centre tunnel. Next c) you have to cover the two knee pads, the two front quarter panels - then the two seat panels under the front seats etc. etc. You can see what I am getting at.
The next task is to unglue the sound proofing that's glued to the bottoms of the two main carpets. As an example -
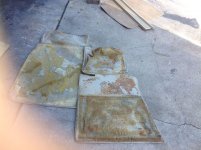
These are just the "basic" old carpet pieces. With those, I was lucky enough to separate the sound proofing from the carpets without doing too much damage. Plenty of WD40 in between the surfaces, and "finger" digging/pushing to separate them. Of course, that's if you want to stay as original as possible.
These carpets came from a well looked after 6.9. Hardly a concours, or pristine look. Probably best described as "patina" - in other words, original but shabby.
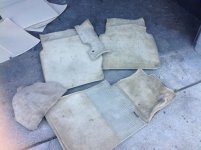
This obviously is the front passenger section. Take note of the original sound proofing, with the new carpet about to be glued to it. Looks pretty spiffy, doesn't it ?
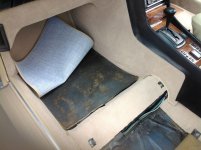
Also note the knee rolls (pads) re-upholstered in backless carpet, as well as gearbox tunnel sides and area under the front seat - driver's side similar.
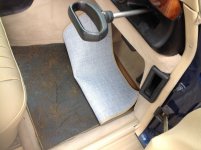
That's what one starts off with most times - if you're lucky !
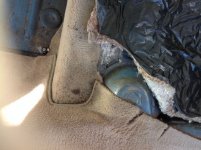
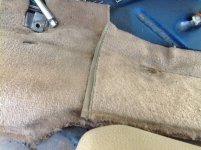
Thanks for looking. You perhaps may also now appreciate that it is, or cannot be, a cheap, throw in a carpet exercise. It takes many hours to unglue the various panels and underlays, and there are some very complex shapes that require recovering. I have also come across previously re-upholstered interiors where the trimmer used backless carpet only (an absolute sin), and also have come across one very expensive car where the carpet has been glued into place - I am talking about the two main carpet pieces. Just imagine the ingress of water - trying to remove water soaked backless carpet - an absolute disaster. Regards Styria
Regarding re-carpeting - many owners tend to think that there are the two main carpets, and perhaps the rear of the centre tunnel, and that's about it. Not so. There are many pieces of carpet, as well as backless carpet, that constitute a carpet replacement task. Take a look -

So you can see what I am talking about - apart from the two main carpets, include a) the front centre console halves b) the sill panels on both sides - to replace those, one needs to remove both front seats. Whilst you are in the process of carrying out that task, you may as well remove the bottom cushion of the rear seat - there are two pieces that are glued to the rear seat support panel, and they meet just at the back of the rear centre tunnel. Next c) you have to cover the two knee pads, the two front quarter panels - then the two seat panels under the front seats etc. etc. You can see what I am getting at.
The next task is to unglue the sound proofing that's glued to the bottoms of the two main carpets. As an example -

These are just the "basic" old carpet pieces. With those, I was lucky enough to separate the sound proofing from the carpets without doing too much damage. Plenty of WD40 in between the surfaces, and "finger" digging/pushing to separate them. Of course, that's if you want to stay as original as possible.
These carpets came from a well looked after 6.9. Hardly a concours, or pristine look. Probably best described as "patina" - in other words, original but shabby.

This obviously is the front passenger section. Take note of the original sound proofing, with the new carpet about to be glued to it. Looks pretty spiffy, doesn't it ?

Also note the knee rolls (pads) re-upholstered in backless carpet, as well as gearbox tunnel sides and area under the front seat - driver's side similar.

That's what one starts off with most times - if you're lucky !


Thanks for looking. You perhaps may also now appreciate that it is, or cannot be, a cheap, throw in a carpet exercise. It takes many hours to unglue the various panels and underlays, and there are some very complex shapes that require recovering. I have also come across previously re-upholstered interiors where the trimmer used backless carpet only (an absolute sin), and also have come across one very expensive car where the carpet has been glued into place - I am talking about the two main carpet pieces. Just imagine the ingress of water - trying to remove water soaked backless carpet - an absolute disaster. Regards Styria

