WGB
New Member
I am sure you hardened DIY'ers would have little interest but here are some photo's of todays axle removal for those who may be considering doing it.
My right side inner axle shaft boot decided to Carc itself almost before my eyes as I was raising it on my hoist to work on my A-C and dump it's load of oil on the floor. The left side has a recent replacement so only one side required doing. The right was Day 1 original.
The Axle is going off to the "Star Shop" after the weekend to have some new"Stretchy boots" fitted.
The car is a 6.9 so it has the Torque reaction rear suspension shared with the 450 and the removal is a little different to other models.
The book says if both shafts are to be replaced it is easier to drop the whole rear subframe - I would agree with this strongly if you have sufficient lifting gear.
Car is jacked up and wheel removed. Bolt and spacer from centre of hub is removed and outer end of drive shaft pressed inwards. I was told this could be very difficult and that the bearing assembly could split and require an entire rear hub re-build. I was pleasantly surprised that the bolt was not much more than finger tight and as I was hand tightening the hub-puller it pushed the spline back to as far as it would go with almost no pressure.
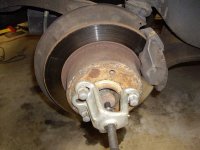
The diff needs to have it's oil drained and on some cars these drain plugs can be very tight. I use an old M-B tool that originally came with a 220 ponton I owned 35 years ago and as you can see it is bent due to hard use in the past.The diff appears wet because it has been sprayed with degreaser.
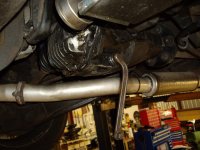
The diff carrier needs to be supported before being lowered and I have accumulated a few helpful tools over the years.
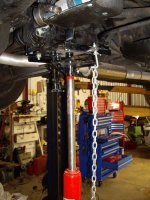
The rear rubber mount must then be removed by removing the two rear M12 bolts and then the four small bolts that screw into the subframe. My car also had a tow-bar that utilises two of these bolts so I had to remove that as well. This picture show the two bolts that hold the towbar removed before removing the goose-neck at the bumper end.
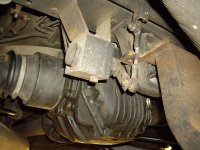
On the 450 and the 6.9 the diff carrier then has to be separated from the subframe, lowered, and then moved a cm or so away from the side of the axle being removed to give clearance for the hub splined end of the shaft to clear the hub. The four studs and nuts that hold the carrier to the subframe were extremely tight on my car and access is very limited. I could only get them turned by using a long ring and open ended spanner interlinked with another one and all my strength to get over the combination of limited space and necessary leverage.
After cracking the nut I was able to use a miniature ratchet to unscrew the 19mm nuts.
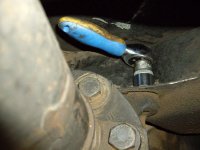
With the four nuts undone the diff carrier could then be lowered as shown here.
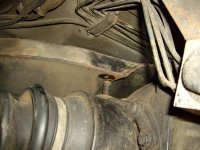
THe rear plate is then fully exposed and can be removed. I tapped the Aluminium casing with a plastic hammer to break the seal.
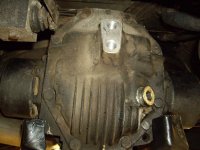
Here are the innards. There is a circlip on the end of the driveshaft splines where the arrow is pointing with a hole that allows it to be hooked and pulled out.
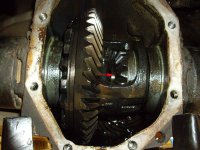
The diff carrier is then moved as far as possible away from the side being removed and with the sun in the correct position and the Moon in Uranus the diff can be raised and rotated just enough to allow the hub splines to clear the housing. The diff end can then be pulled free and with care the shaft can be manouvered out without removing the hand-brake cable or the rear brake line to the calliper as recommended in the manual.
There is a spacer ring on the diff end of the shaft that is very specific to that fitting so care must be taken to store it properly.
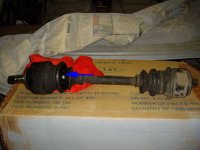
Here is my shaft with an arrow pointing to the 1/2 cm hole in the boot that appears caused by 29 years of Rubber fatigue.
There is a post script to this - the four holes in the subframe that the studs for the carrier fit are a very tight fit and to get the carrier back in position took me over an hour and that was with a totally adjustable transmision jack to get the angle correct. If I was on my back with car on axle stands I would be finding a rat-tail file to increase the size of the holes a little bit.
I know this posting is a bit of an odyssey but someone may find it useful.
Bill
My right side inner axle shaft boot decided to Carc itself almost before my eyes as I was raising it on my hoist to work on my A-C and dump it's load of oil on the floor. The left side has a recent replacement so only one side required doing. The right was Day 1 original.
The Axle is going off to the "Star Shop" after the weekend to have some new"Stretchy boots" fitted.
The car is a 6.9 so it has the Torque reaction rear suspension shared with the 450 and the removal is a little different to other models.
The book says if both shafts are to be replaced it is easier to drop the whole rear subframe - I would agree with this strongly if you have sufficient lifting gear.
Car is jacked up and wheel removed. Bolt and spacer from centre of hub is removed and outer end of drive shaft pressed inwards. I was told this could be very difficult and that the bearing assembly could split and require an entire rear hub re-build. I was pleasantly surprised that the bolt was not much more than finger tight and as I was hand tightening the hub-puller it pushed the spline back to as far as it would go with almost no pressure.

The diff needs to have it's oil drained and on some cars these drain plugs can be very tight. I use an old M-B tool that originally came with a 220 ponton I owned 35 years ago and as you can see it is bent due to hard use in the past.The diff appears wet because it has been sprayed with degreaser.

The diff carrier needs to be supported before being lowered and I have accumulated a few helpful tools over the years.

The rear rubber mount must then be removed by removing the two rear M12 bolts and then the four small bolts that screw into the subframe. My car also had a tow-bar that utilises two of these bolts so I had to remove that as well. This picture show the two bolts that hold the towbar removed before removing the goose-neck at the bumper end.

On the 450 and the 6.9 the diff carrier then has to be separated from the subframe, lowered, and then moved a cm or so away from the side of the axle being removed to give clearance for the hub splined end of the shaft to clear the hub. The four studs and nuts that hold the carrier to the subframe were extremely tight on my car and access is very limited. I could only get them turned by using a long ring and open ended spanner interlinked with another one and all my strength to get over the combination of limited space and necessary leverage.
After cracking the nut I was able to use a miniature ratchet to unscrew the 19mm nuts.

With the four nuts undone the diff carrier could then be lowered as shown here.

THe rear plate is then fully exposed and can be removed. I tapped the Aluminium casing with a plastic hammer to break the seal.

Here are the innards. There is a circlip on the end of the driveshaft splines where the arrow is pointing with a hole that allows it to be hooked and pulled out.

The diff carrier is then moved as far as possible away from the side being removed and with the sun in the correct position and the Moon in Uranus the diff can be raised and rotated just enough to allow the hub splines to clear the housing. The diff end can then be pulled free and with care the shaft can be manouvered out without removing the hand-brake cable or the rear brake line to the calliper as recommended in the manual.
There is a spacer ring on the diff end of the shaft that is very specific to that fitting so care must be taken to store it properly.
Here is my shaft with an arrow pointing to the 1/2 cm hole in the boot that appears caused by 29 years of Rubber fatigue.

There is a post script to this - the four holes in the subframe that the studs for the carrier fit are a very tight fit and to get the carrier back in position took me over an hour and that was with a totally adjustable transmision jack to get the angle correct. If I was on my back with car on axle stands I would be finding a rat-tail file to increase the size of the holes a little bit.
I know this posting is a bit of an odyssey but someone may find it useful.
Bill
Last edited:
